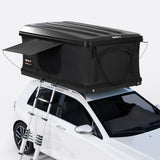
TentBox Cargo 2.0 installation guide
Summary
Before your TentBox Cargo is ready to use, you need to first attach several parts to the TentBox Cargo, and then mount the TentBox Cargo to your car. All of the attachments fit directly to the accessory rails on the outside edges. This article explains this process in detail.
TentBox User Guidelines
Make sure you always follow the TentBox User Guidelines when choosing, installing, and using your TentBox and roof bars.
If you have any questions regarding the installation or use of your TentBox, please get in touch with our support team. Do not install or use your TentBox if you do not understand these instructions.
Installation guide
Unboxing
Please be careful when unboxing your TentBox, and take extra care with children around. It's a large and heavy product, with a number of moving parts and mechanisms that could cause injury if care isn't taken.
It's important to check your TentBox thoroughly when first opening to ensure any metal shards that may be present from the manufacturing process are removed before use. Although we clean these out before packaging the TentBox, in some cases more trapped shards can fall out during transit and the final delivery. Please make sure to double check and use a hoover to remove any more shards you do find.
Installation
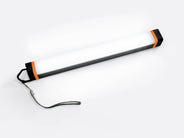
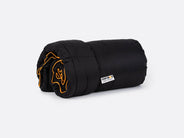
Inside the TentBox Cargo 2.0, you'll find the ladder, welcome kit, bar light, hardware box and fixing kit. There is also a zip bag under the mattress with the porch poles inside. For the install, you'll need the hardware box and fixing kit, but you should remove everything else for the installation as well.
- First, take the hardware box. All of the hardware is attached using the square fasteners and short bolts.
- When sliding the square fasteners into the channels, make sure the rounded side with the A2 mark is facing towards the TentBox, and the flat side is facing towards you. You can slide the fasteners into place and line them up using the allen key.
- Take the handle from the hardware box and securely attach it to the middle of the top rail at the rear of the TentBox using two square fasteners and two bolts.
- Then, take the two closing latches and attach them securely along the same rail. You can remove the latch bar for easier access to the nuts if required and then reattach it. They should be 8 inches from either side, using two square fasteners and two bolts for each.
- Next, take the two closing buckles and attach them onto the channel below, making sure they line up with the latches above. Use two fasteners and two bolts for each buckle.
- Then, take the pole bases and attach these on the same rail as the closing buckles. Use two fasteners and two bolts for each pole base. They should be 3 inches from each edge, and the angle of the hole should be facing away from the centre.
- Finally, attach the ladder receivers. There are two sets of receivers – you can enter the TentBox Cargo from either side or the rear.
- Choose two doors to attach the receivers to. Attach the receivers loosely to the bottom channel of your chosen door. The spring pins should be facing away from the centre.
- Then, use the ladder to make sure they are spaced correctly before tightening them securely using two square fasteners and two bolts for each ladder receiver.
- Repeat this step on your other chosen door with the remaining set of ladder receivers.
Mounting to your vehicle
You must ensure that the fixing clamps are adequately tightened, so that your TentBox is securely fixed to your roof bars.
The friction of the fixing clamps against your roof bars holds your TentBox securely to your car, so you must make sure the nuts are adequately tightened to prevent any movement.
We recommend that you give the TentBox a hard shove in each direction, especially from the front and back in the direction of the fixing rails, to ensure there is no movement.
- With the help of at least one other person, carefully lift your TentBox onto your roof bars and position centrally.
- Make sure it’s straight and ensure the vehicle’s tailgate (if you have one) can still open.
- Clamp the TentBox to your roof bars at 4 points using the fixing clamps provided:
- First, drop each of the eight bolts from the fixing kit into a slider and slide them into the fixing rails underneath the TentBox.
- You should slide all eight bolts onto the rails and position them so that you have one hanging down on either side of the roof bars at four different points.
- Take the four U-clamps and tighten them to each of the connection points using the nuts and spanner provided. Tighten them to the point where you see a very slight bend in the U-clamp.
- Once finished, you should have four secure clamps attaching your TentBox Cargo 2.0 to the roof bars.
- Insert the plastic caps into the end of the rails, then give the TentBox a hard shove in each direction to make sure it's secure and you don't see any movement.
Retightening your roof bars
This step is very important to ensure your TentBox remains securely fastened to your car.
Roof bars loosen slightly after first being loaded with a significant weight, so it is paramount you retighten them to ensure your TentBox remains secured to your vehicle.
You should do this after first loading your roof bars with significant weight, for example after sleeping in it for a night.
Once they have been retightened, they will generally remain tighter for longer. However, you should then regularly check and retighten your roof bars as appropriate, following the advice laid out in our TentBox User Guidelines.
How to use your TentBox Cargo 2.0
Opening your TentBox Cargo 2.0
- Undo the two metal buckles at the back of the TentBox, then push the top shell. The gas struts will do the rest of the work for you.
- The elastic cord keeps the fabric contained when closing it down, and should be lowered before using your TentBox.
- It can sit at the bottom of the fabric or hook over the bottom corner.
- Remember, your pillows and sleeping bags or duvet can stay inside the TentBox Cargo 2.0 when it's closed.
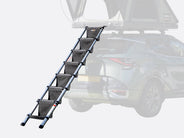
Using the ladder on your TentBox Cargo 2.0
- The ladder can live inside the TentBox or in the back of the car.
- Connect it to the spring pins, then remove the velcro and extend it.
- Extend the ladder from the top rung first, making sure each rung locks into place before extending the next.
- To close the ladder, start from the bottom and push the two black buttons inwards. The rung above will collapse, so push upwards and then repeat the process until the ladder is fully closed. Then apply the velcro.
Please be careful of your fingers as the ladder can drop suddenly.
Do not let children use the ladder while unsupervised.
Ensure the ladder is as vertical as possible for your vehicle's height.
Using your TentBox Cargo 2.0 porch poles
- You'll find the porch pole bag underneath the mattress. Use these to prop open the door to create a porch.
- First slot them fully into the base. They go in at an angle facing away from the centre.
- Then bend them up and hook them into the metal eyelets on the doors.
- If you can't reach when you're standing outside, you can also do this from inside the TentBox.
- TThe porch can also be fully removed to enter “summer mode”. To remove it, unzip the sides, then unzip the top.
- The TentBox is still waterproof like this, but you won’t be able to open the end door in the rain without getting wet.
Install the pole into the base first, before bending it upwards to connect with the eyelets.
Make sure you stand to the side when installing the poles, so that if you miss the eyelet, the pole does not spring into you.
Using your LED Bar Light
- The LED Bar Light that comes with your TentBox can be slotted into the holders, where you can spin it around to change the angle.
- To operate the light, press the end button to cycle through the settings, then press and hold the button to adjust the brightness.
- The Bar Light can also be used to charge your phone – just remember to charge the light fully before you head out on a TentBox trip.
- It also has magnets for attaching it to your car to light up your camp area.
Preventing condensation
- As with all enclosed spaces, condensation buildup can occur.
- This heavily depends on how many people are inside the TentBox, the outside temperature and the humidity.
- The best way to prevent condensation is ventilation.
- The Cargo already has vents built into the fabric and the base. For added ventilation, you can also open the side windows slightly.
Closing your TentBox Cargo 2.0
When closing your TentBox, do your best to remove any water buildup on the fabric. You can do this by bashing the side of the fabric to knock the water off and also by opening the windows to let it air out for 5 to 10 minutes before packing it away.
If it's raining and you need to leave, you can pack it away wet. Just make sure you open it up again within 24 hours to stop the water from festering.
Make sure it's fully dry before closing it away for longer than 24 hours.
- Before closing, make sure the end windows are open slightly, as this allows air to escape and makes closing it down easier.
- Lift the elastic back up into place to help keep the fabric tucked away neatly.
- Close the ladder down and put it inside the TentBox or the boot of your car.
- Pull down on the closing handle until the TentBox is closed. Walk around the TentBox, making sure all of the fabric is tucked in.
- Once all of the fabric is tucked away neatly, you can fasten the two buckles at the end.
Storage & care
We recommend keeping your TentBox on your car all year round so you're always ready for adventure. If you do want to remove it, you can store it on its side – just make sure to put something on the ground to protect the shell.
Aside from ensuring it’s fully dry when packing away for more than 24 hours, we also advise cleaning the fabric with warm water once a year and then reproofing it with a standard tent reproofer.
As always, if you need any support with your TentBox, just reach out to our friendly and experienced team of Product Specialists.

