Cargo Roof Bars Installation Guide
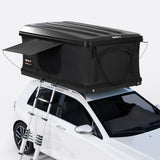
The Cargo Roof Bars are ideal for carrying bikes and kayaks on top of your TentBox Cargo, as well as additional gear in the Storage Box.
Attaching seamlessly to the accessory rails on your TentBox Cargo, you’ll be set up and ready for adventure in no time.
Here’s how to install them.
VIDEO GUIDE
WHAT’S INCLUDED?
In the box you’ll find 8 nuts, 8 bolts and the 2 roof bars.

STEP-BY-STEP INSTRUCTIONS
STEP 1
- Grab 2 of the nuts.
- Making sure the flat edge is facing outwards, slide the nuts into the top accessory rail of your TentBox Cargo.
- Repeat the process at the other end, then do the same on the opposite side.
- You should end up with 4 sets of 2.
STEP 2
- Carefully place your first roof bar on top of the Cargo.
- You can lift one side at a time to check it’s level with the nuts in the accessory rail.

STEP 3
- Now grab your bolts.
- Loosely screw them in through the roof bars into the nuts and repeat the same process on the other side.
- At this point, you can adjust the position of your roof bars according to your needs.

STEP 4
- Now repeat the process with the second roof bar.
- It’s up to you how you place them, as long as they measure the same distance on each side.
- Once you’re happy with the placement of your roof bars, secure the bolts using a 13mm spanner.

IMPORTANT
The Cargo Roof Bars weigh 8kg. They can hold up to 100kg when the TentBox is closed and up to 40kg when open.
Remember to consider your car's roof weight limit, factoring in the weight of the bars and any items mounted on them as well as the TentBox itself.
ADDITIONAL SUPPORT
Need help installing your Cargo Storage Box? Read the instructions here.
If you have any further questions about your Cargo Roof Bars, get in touch with our team of friendly Product Specialists. We’re here to help.
