Cargo 2.0 Living Pod Installation Guide
Introduction
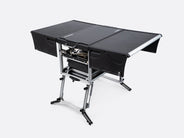
The Living Pod is designed to attach seamlessly to your TentBox Cargo 2.0, providing additional shelter from rain and sun. It can also be set up in 'Wing Mode' for a larger sheltered area.
What’s Included
- Living Pod (in three sections: top panel, back panel, and main living tent)
- Camping poles (three different lengths)
- Telescopic prop poles
- Hardware bag (with channel nuts and thumb screws)
- Ground sheet

Step-by-Step Instructions
1. Installing the back panel
- Identify the top edge with the tabs on the smaller fabric panel.
- Make sure the tabs are facing away from the car, so they'll be accessible from within the pod.
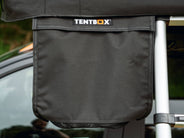
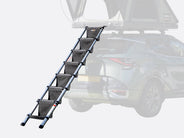
- Slide the top of the material through the channel beneath the TentBox and behind the ladder.

|
 |
2. Installing the top section
- Identify the attachment hooks at the top of the fabric.
- With the TentBox closed, hook them under the spaced loops.
- Start from the left and stop when you reach the gas strut.
- Attach the left corner of the top section to the upper shell’s T-slot.
- Secure the top corners using channel nuts and thumb screws from the hardware bag:
- Slide the nut into the accessory rail, align it with the eyelet in the corner fabric, and loosely screw it into place. Do the same on both sides.
- Stretch the fabric along the accessory rail and tighten the thumb screws.
- Raising the TentBox slightly, finish inserting the hooks into the loops on the right side of the gas strut.
- At this point, you can fully raise the TentBox and connect the back edge of the top section to the Cargo’s rainfly. Use the velcro to secure everything down.
 |
 |
 |
 |
 |
|
- Start by inserting the pole holders into both ends of the upper T-slot channel on the base of the tent.
- Securely tighten them, ensuring the protruding part is on the outer side and fits against the end of the accessory rail.
- There are three different lengths of poles. Start with the medium-sized pole, sliding it into the sleeve at the bottom of the middle panel, underneath the window.
- The longest pole fits into the panel at the front, and the shorter pole in the panel at the back of the TentBox.
- Insert the poles into the pole holders to secure.

|

|
- Connect the main Living Pod section to the top section using the velcro and starting with the middle panel. Ensure the velcro wraps above and below the poles.
- Attach the left corner to the lower T-slots on the TentBox base, using the channel nuts and thumb screws.
- Stretch the cover to ensure it’s taut and securely fastened, then repeat the same process on the right corner.
- Once that’s done, zip each side into place.

|
 |
- Tie the guy ropes to the fixing points if not already attached.
- Pull the guy rope out from the corner under the left-hand side of the window, peg it down at a 60-degree angle.
- Repeat on the right-hand side of the window.
- Create tension in the Living Pod fabric and peg it down, starting with the front two straps, then the sides.
- Unzip and open your side door, rolling the outer panel and the inner fly mesh up and out of the way.
- Lay the ground sheet, ensuring it’s stretched flat, overlapping the back panel. Peg it down through the eyelets around the entire Living Pod area.
- Adjust the tension using the adjustable straps to ensure the sides are taut.

|
 |
 |
6. Setting up wing mode
- Unzip the front panel sides to enter Wing Mode.
- Extend the telescopic prop poles to the desired height, slot them into the front panel eyelets, and secure them with guy ropes and pegs.

Final Check
- Ensure all sections are securely fastened and there is no slack in the fabric.
- Make any final adjustments to the tension of the guy ropes and fabric.
Tips
- For a stable setup, ensure telescopic prop poles are upright.
- The further you stretch the guy ropes, the more stable your Living Pod will be.
Support
If you have any questions, reach out to our friendly team of Product Specialists.

